Code outlining is a feature of supported by Visual Studio and many other editors, MSDN has some good documentation for VS2005, VS2008 and VS2010. If I were asked to explain this as briefly as possible, I would probably say:
Code Outlining is the logical partitioning of code in such a way that the user interface, or editor, is able to selectively hide the body of the content (such as a class, struct, enum or method) whilst leaving the signature or some identifying comment visible.
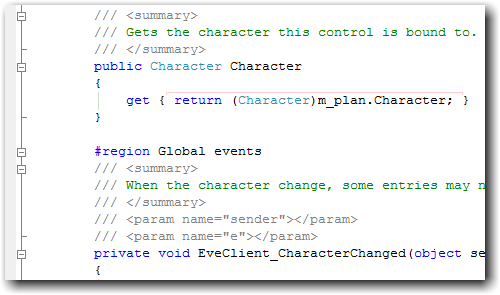
You can see this in action in Visual Studio 2008 with the following Screenshot:  I accidentally turned off Code Outlining today by hitting some keyboard shortcut that I didn’t know how to reverse, this lead me to discover several useful keyboard shortcuts for managing the display of your code from the keyboard. As it turns out I managed to hit Ctrl-M followed by Ctrl-P (or just P in fact) which maps to Edit.StopOutlining, by default it seems that the Visual C# 2005 mapping scheme doesn’t provide a shortcut to enable Automatic Outlining so instead you can access the command through Edit Menu -> Outlining -> Start Automatic Outlining. Enabled again, I get to play with code outlining from the keyboard:
- To toggle (collapse an expanded block or expand a collapsed block) the closest outlined element use Ctrl-M followed by Ctrl-M.
- To toggle everything use Ctrl-M followed by Ctrl-L (I find little use for this)
- To collapse to definitions use Ctrl-M followed by Ctrl-O
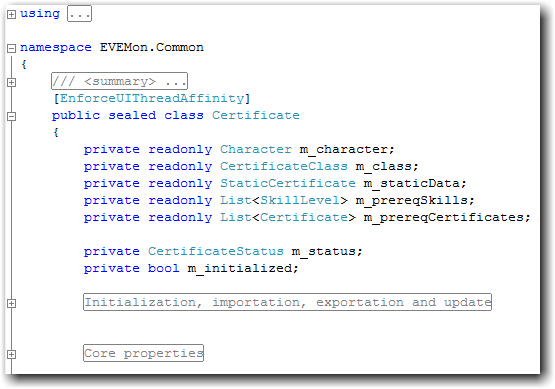
The last one is the most useful when used in conjunction with Regions as after colapsing to definitions you will get something similar to this:  You might have noticed in the first screenshot that CodeRush Xpress adds a coloured line between the beginning and end of blocks of code, this is a nice feature if you have long blocks of code, which of course you shouldn’t have.
  There we go, an errant key stroke can lead to learning and blogging, who would have thought it?